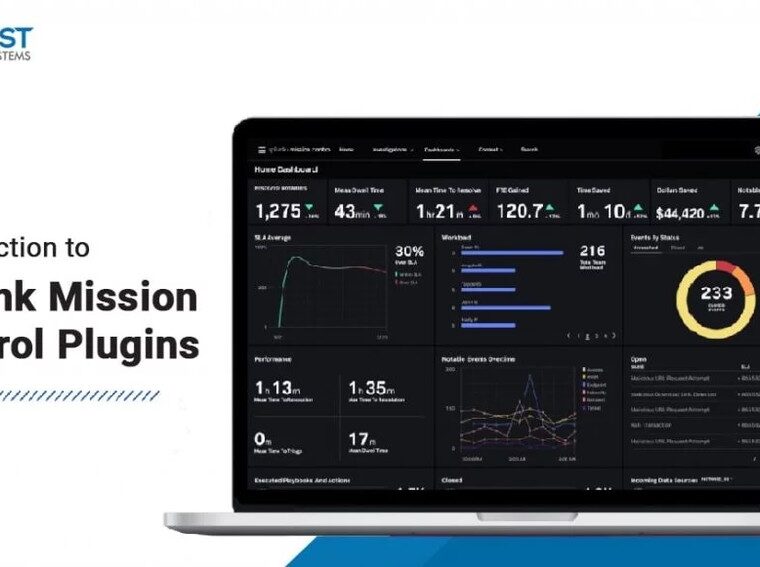
Unify your SOC with Splunk Mission Control Plugins

Introduction to Splunk Mission Control
Splunk Mission Control attempts to reinvent security operations, it’s a unified security operations platform that brings together security data, analytics, and operations under one umbrella. It has the capability to satisfy a SOC analyst’s use case at every step of the security event lifecycle. It’s a one-stop solution to detection, management, investigation, collaboration & remediation of threats. Learn more about Splunk Mission Control.
Splunk unveiled Mission Control Plugin Framework at .conf ‘20, the framework empowers developers to build MC Plugins which bundles UI extensions to cater to a SOC analyst’s use cases, ranging from Splunk style dashboards to Analyst Queue tabs, Investigation tabs & Context Menu Tabs all powered by the new Unified Dashboards Framework (UDF). Let’s dive deeper and understand the capabilities of the framework.
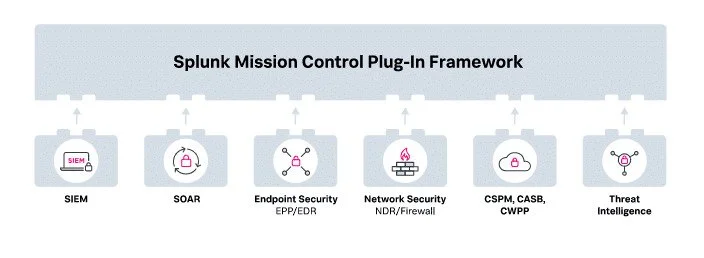
Plugin’s Use Cases & Workflows
There are four UI extension points exposed by Mission Control Plugin Framework:
Dashboards
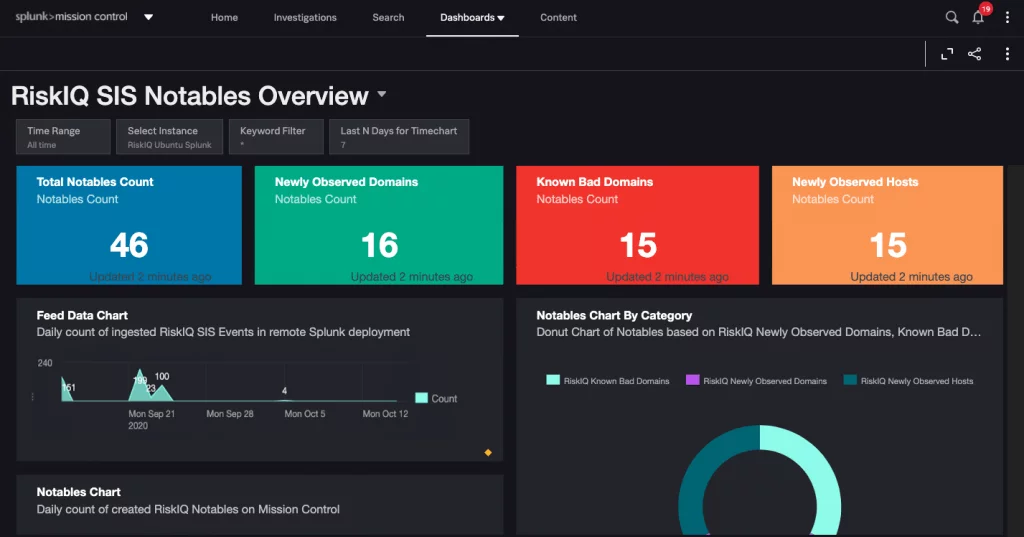
We can develop attractive Splunk dashboards backed by the powerful new Unified Dashboard Framework (UDF). What’s more interesting is, that these dashboards can fetch data from both Mission Control Indexes & On-Prem/Cloud Splunk Deployments. These dashboards are bundled within the Mission Control Plugin and available to MC users once the plugin is enabled.
Here is a dashboard for RiskIQ’s SIS Notables,
Analyst Queue Tabs
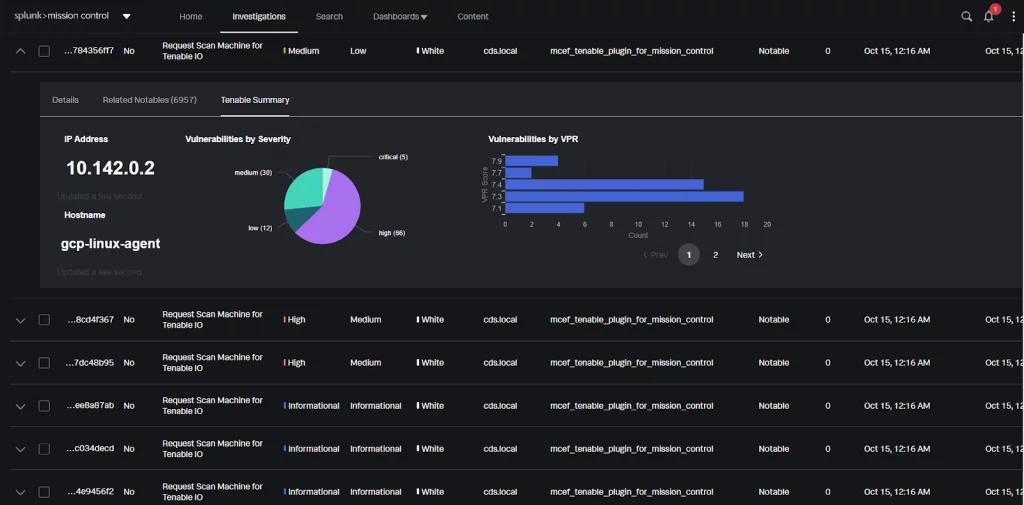
A normal day in a SOC analyst’s life starts with triaging security incidents (Notables), this involves traversing multiple tools to gather the right insight. Mission Control eases this task by introducing Analyst Queue Tabs, these tabs open when a Notable is expanded on Mission Control’s Investigation dashboard, the Plugin Framework allows developers to populate the desired visualizations within these Analyst Queue tabs. This would provide the analyst a direct visibility into the insights provided by various CSPM/SIEM/EDR tools at the same place.
Here’s how an Analyst Queue Tab for Tenable Vulnerabilities looks,
Investigation Tabs
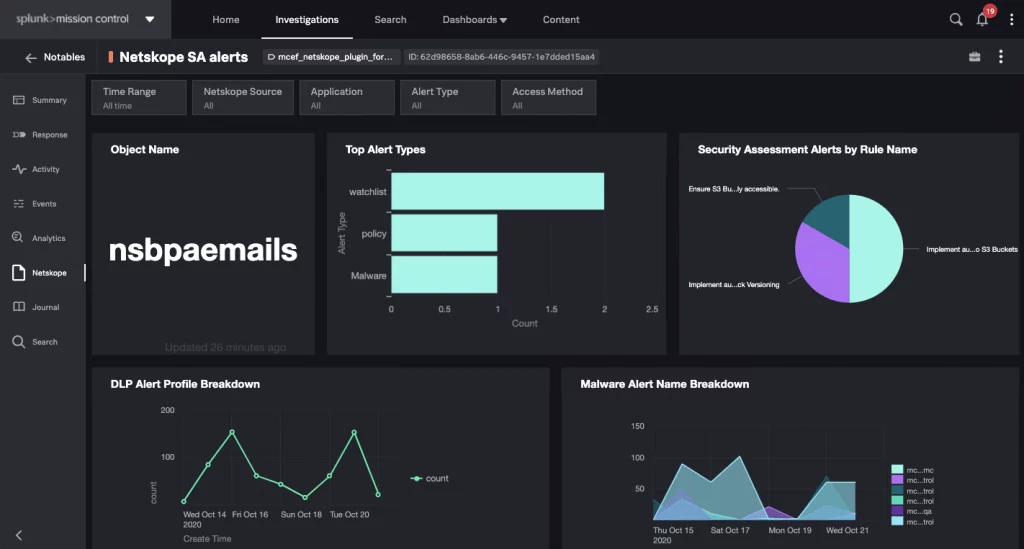
While investigating a security incident, a real-time data-driven insight is often required, this would again involve traversing a lot of tools and filtering the data with the right indicators, with Investigation tabs, Mission Control allows users to drill down into the incident and view detailed dashboards for each incident, known as Investigation Tabs, Plugin Framework allows developers to add their own tabs. The best part about this is, unlike normal dashboards, these views are specific to the drilled down incident.
Here’s an Investigation tab for Netskope which provides visibility about alerts on the object being investigated.
Context Menu Tabs
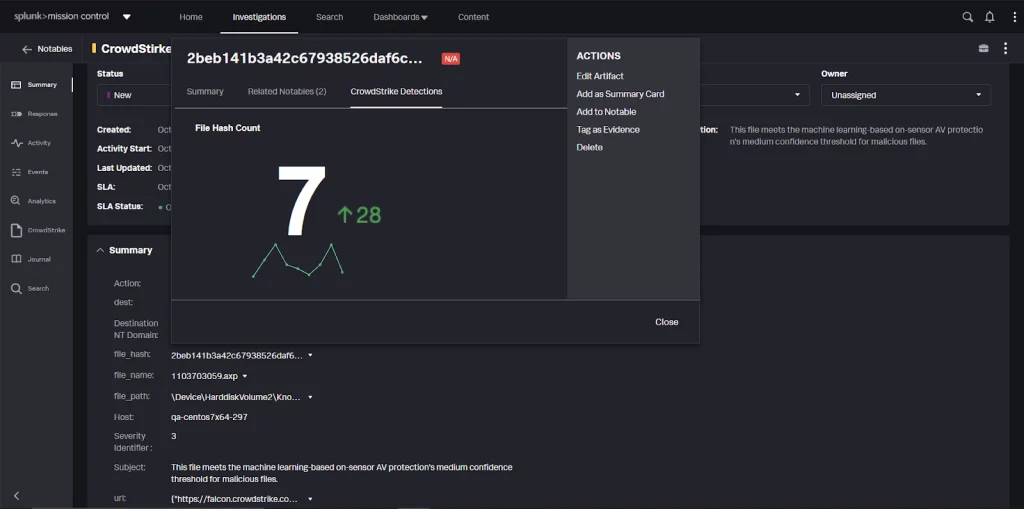
At times, an Analyst needs insights about specific indicators (fields), which involves searching for the indicator across various platforms, with Mission Control, users can just click on the indicator, and a contextual menu pops up with tabs with the desired visualizations. Here’s how a context menu tab looks like for CrowdStrike Detections on a file’s SHA,
Deployment & Flow of Data
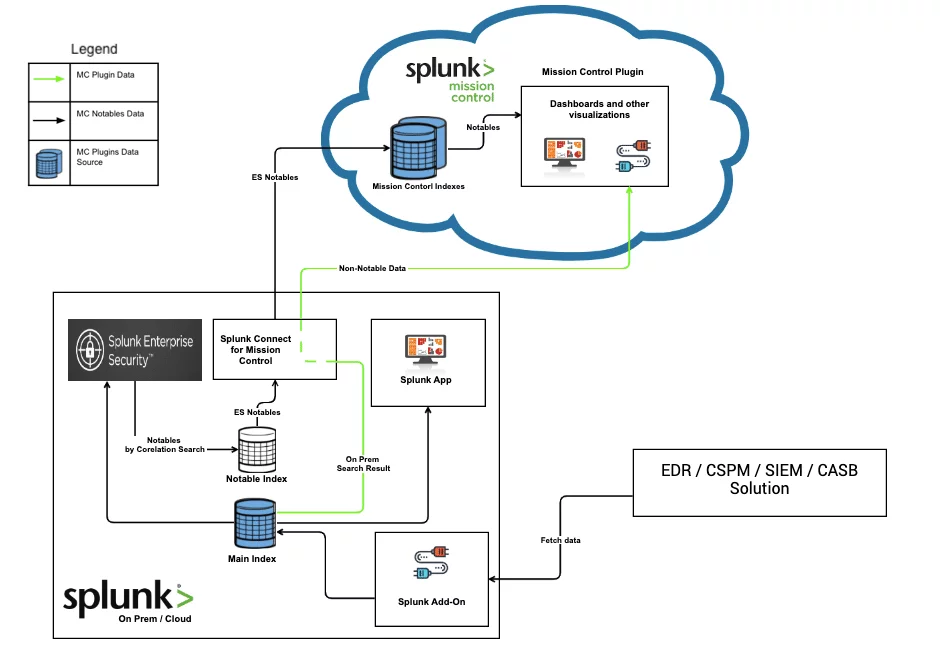
This is how a Mission deployment would look, Mission Control residing in the Cloud, would be able to communicate with the Splunk Enterprise/Enterprise Cloud deployments via the Splunk Connect for Mission Control App.
Inviting Partners
This is just the beginning, the possibilities with Mission Control Plugins are endless and we are excited to work with more partners to develop integrated solutions to suffice their workflows.

Author
JAINIL DESAI
Jainil Desai is a Splunk enthusiast who started his journey at Crest Data with Splunk’s cloud infrastructure monitoring solutions, he loves exploring new Splunk products and building its integrations, He recently started working on Splunk’s unified SOC solution, Mission Control.


